This guide will help you connect your Airtable bases to Hunch in just a few minutes.Documentation Index
Fetch the complete documentation index at: https://docs.hunch.dev/llms.txt
Use this file to discover all available pages before exploring further.
✅ What You’ll Need
- Airtable Account at airtable.com
- Access to create personal access tokens in your Airtable account
1️⃣ Create Personal Access Token
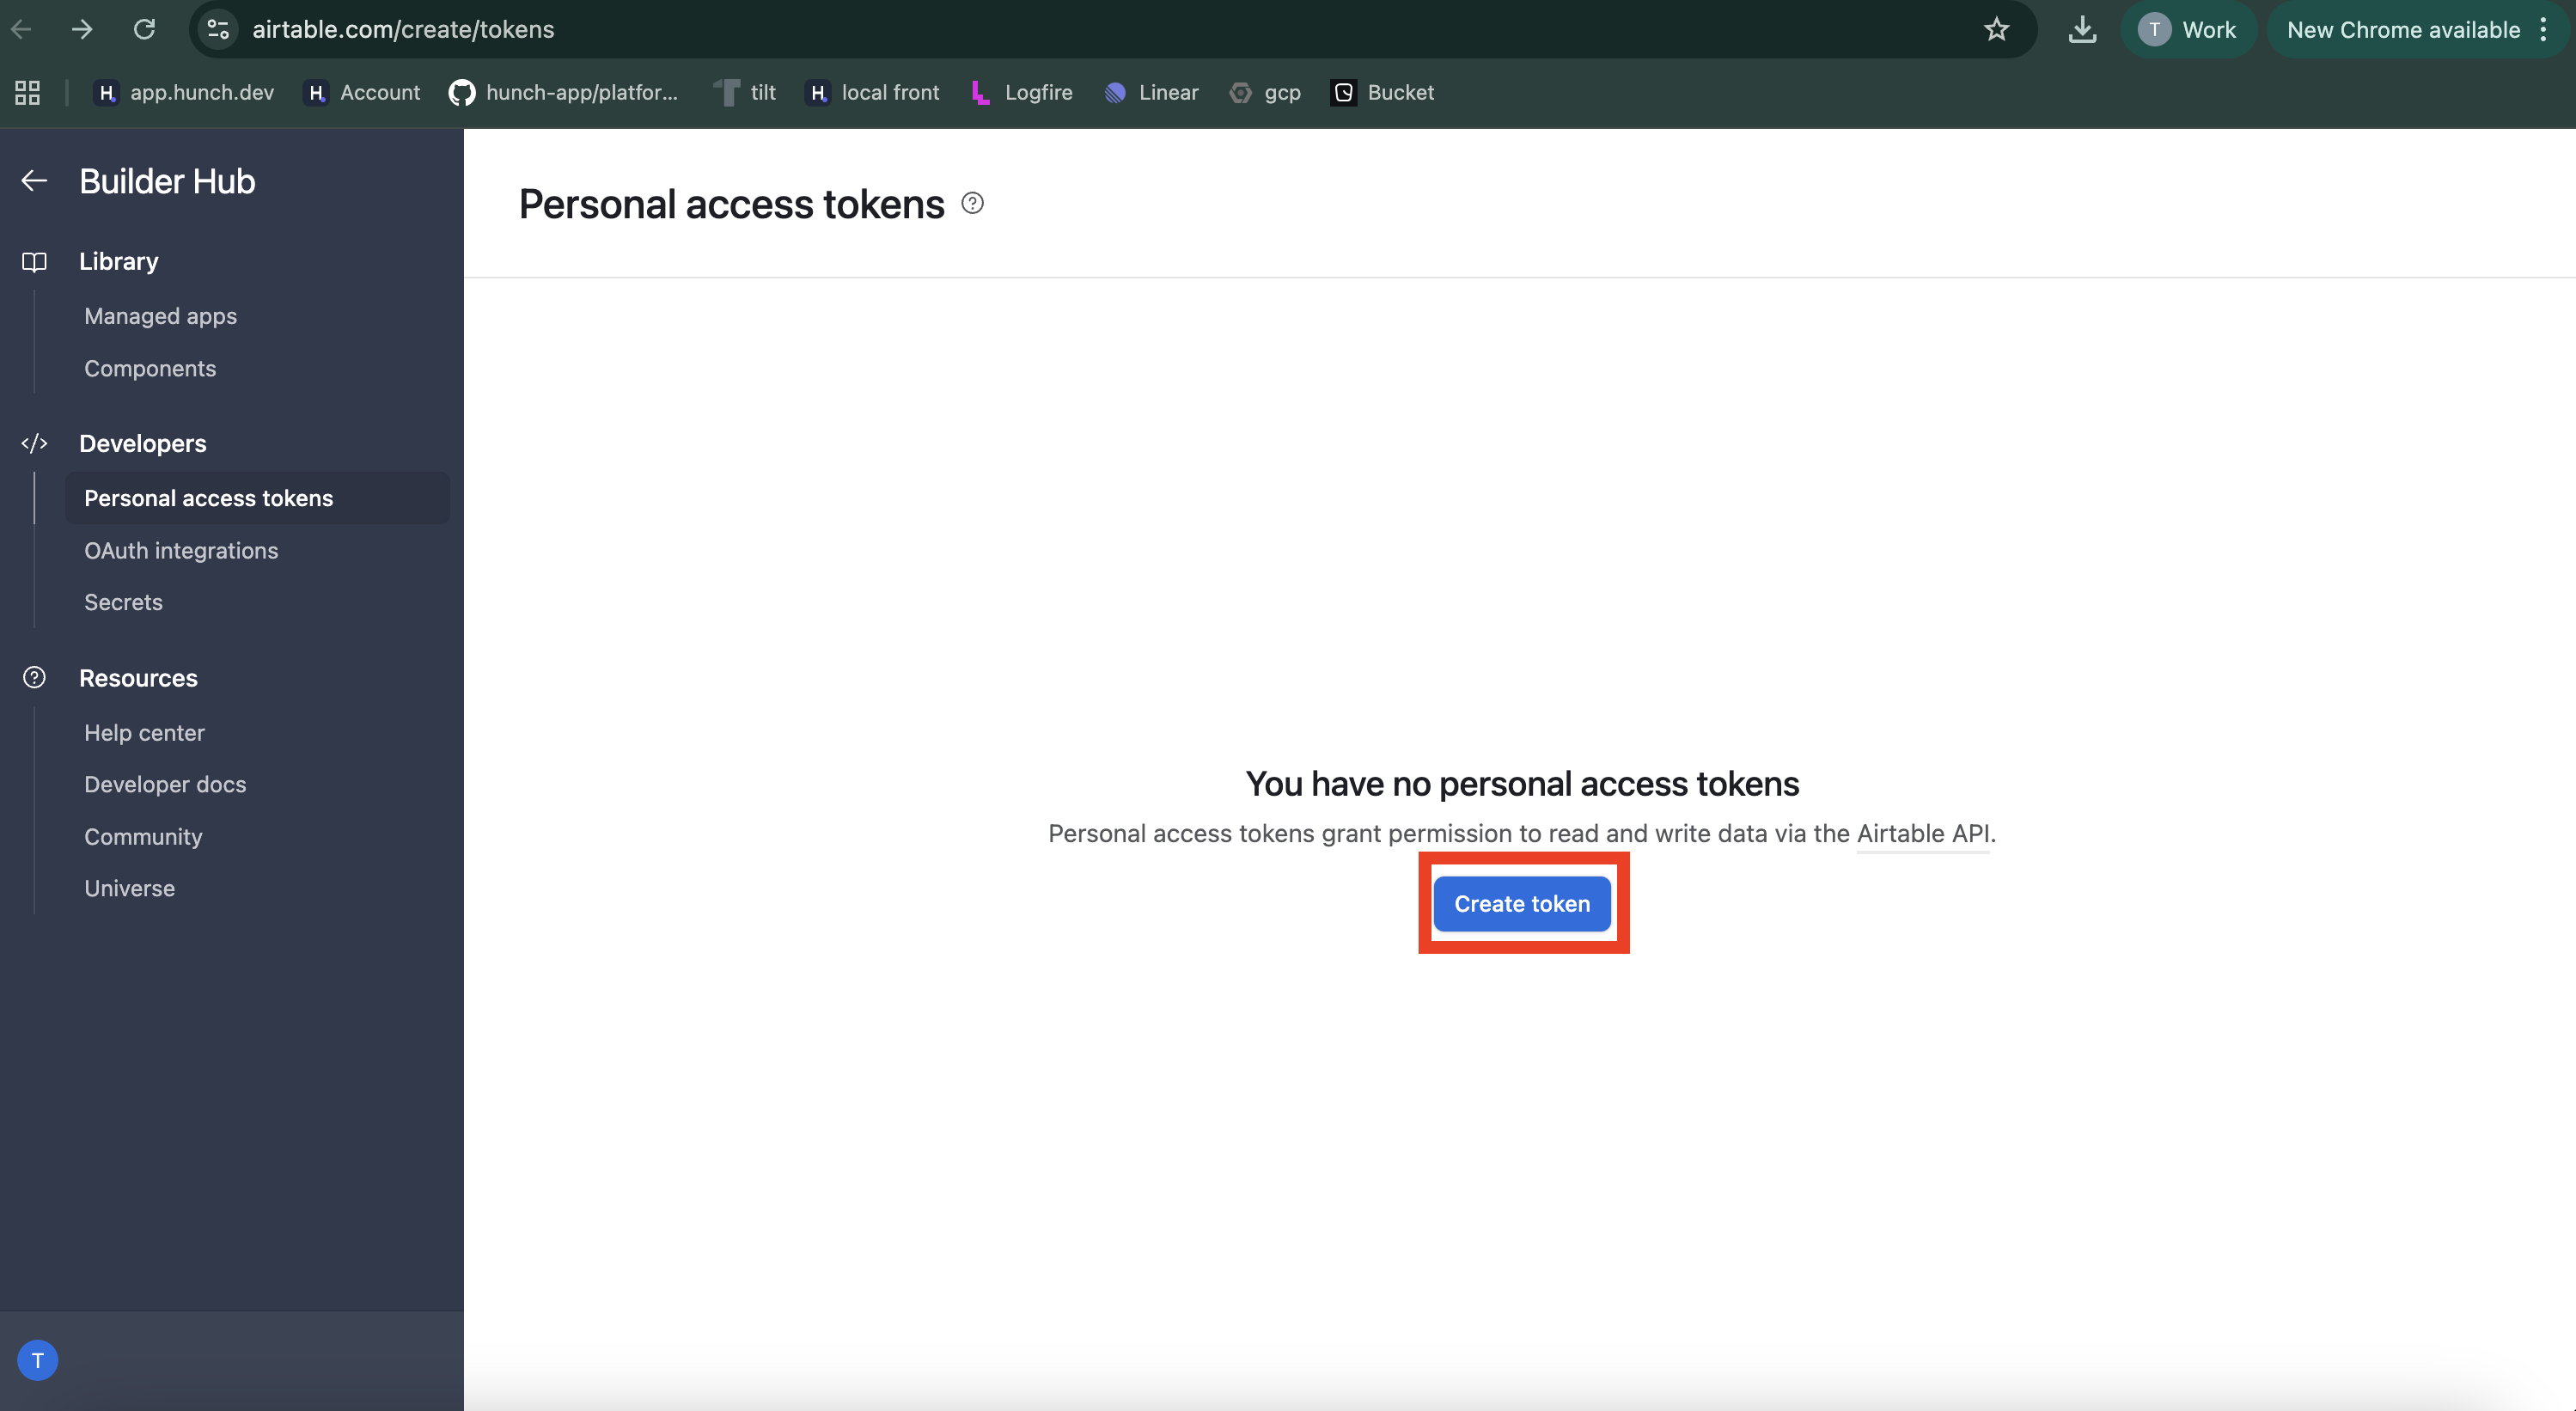
First, let’s create a personal access token for Hunch to access your Airtable data:Step 1: Navigate to Token Creation
- Go to airtable.com/create/tokens
- Click the “Create token” button
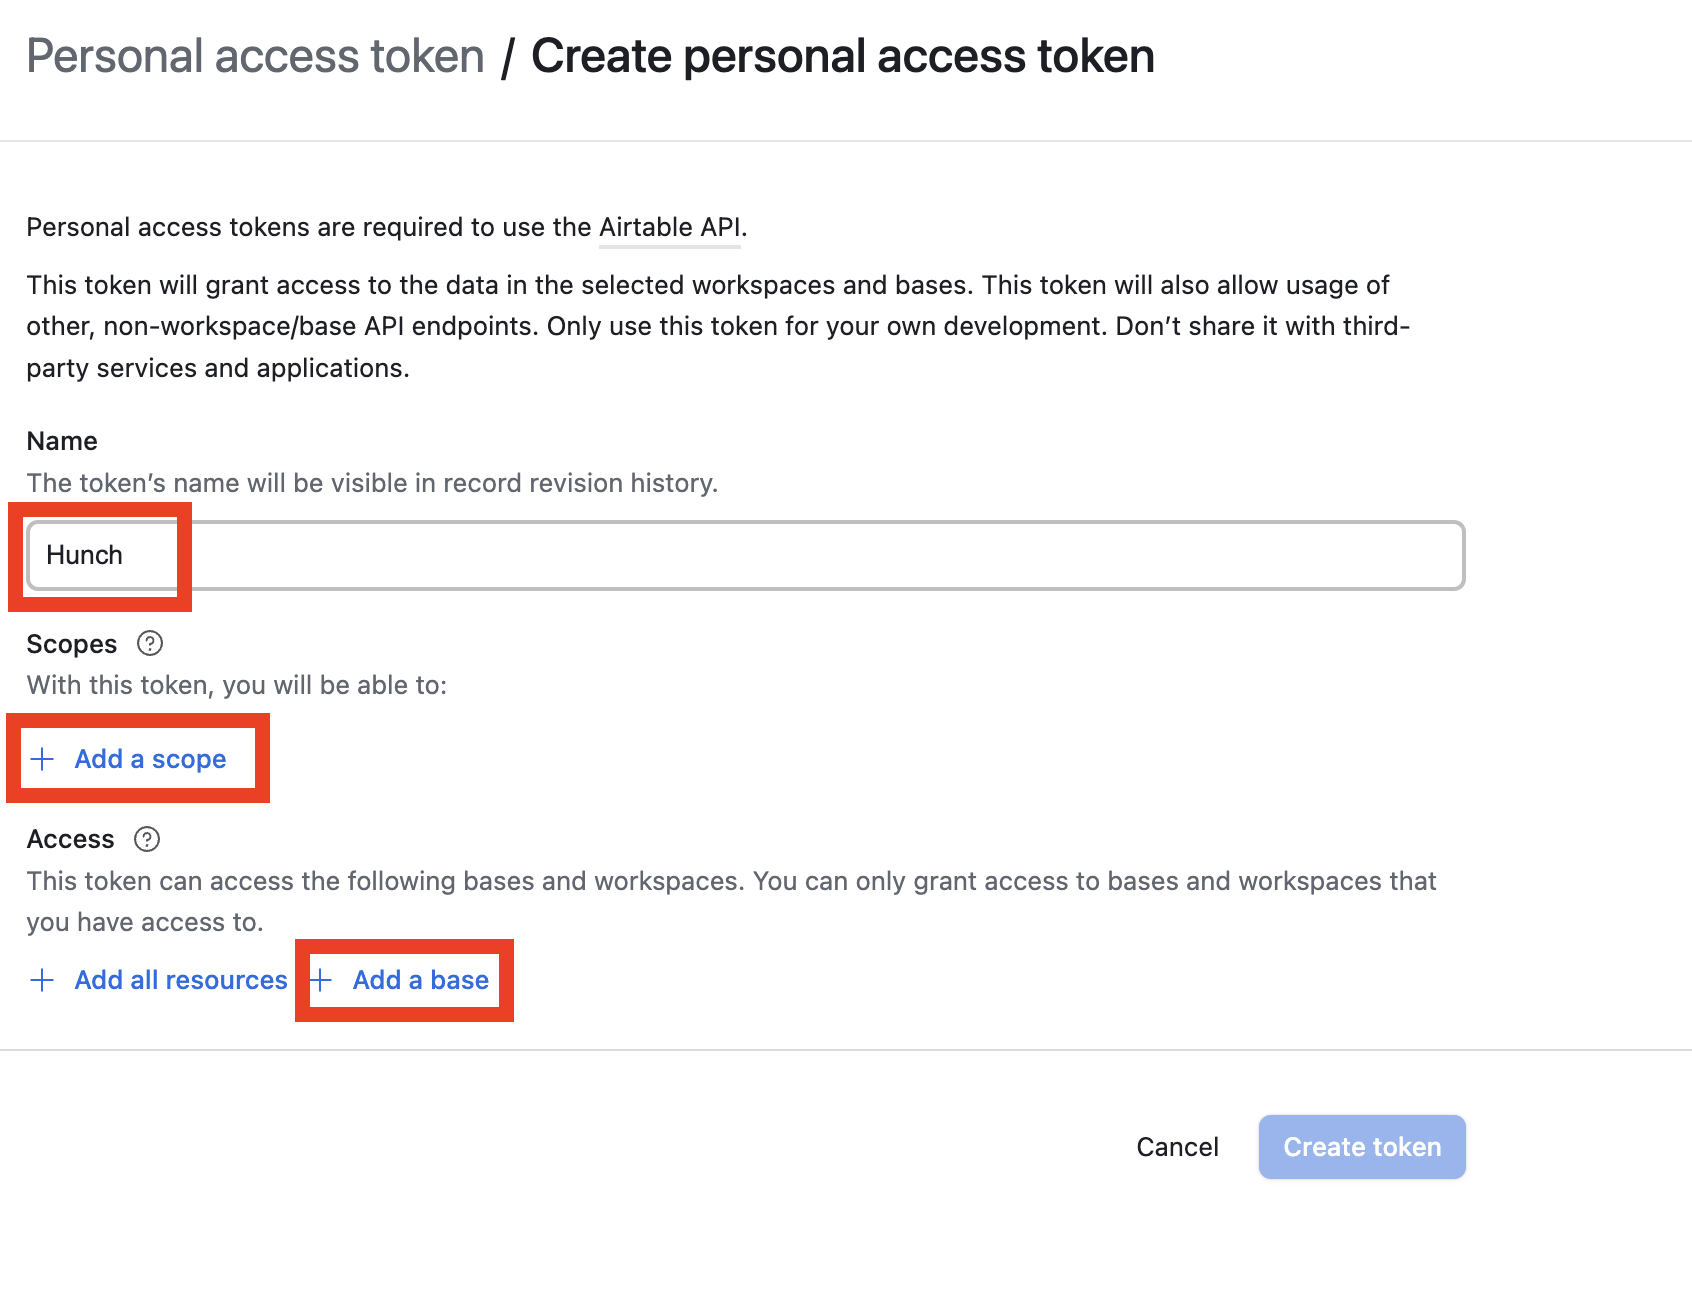
Step 2: Configure Token Settings
- Fill in the name field with a descriptive name (e.g., “Hunch Integration”)
- Configure the scopes and access sections as shown below:
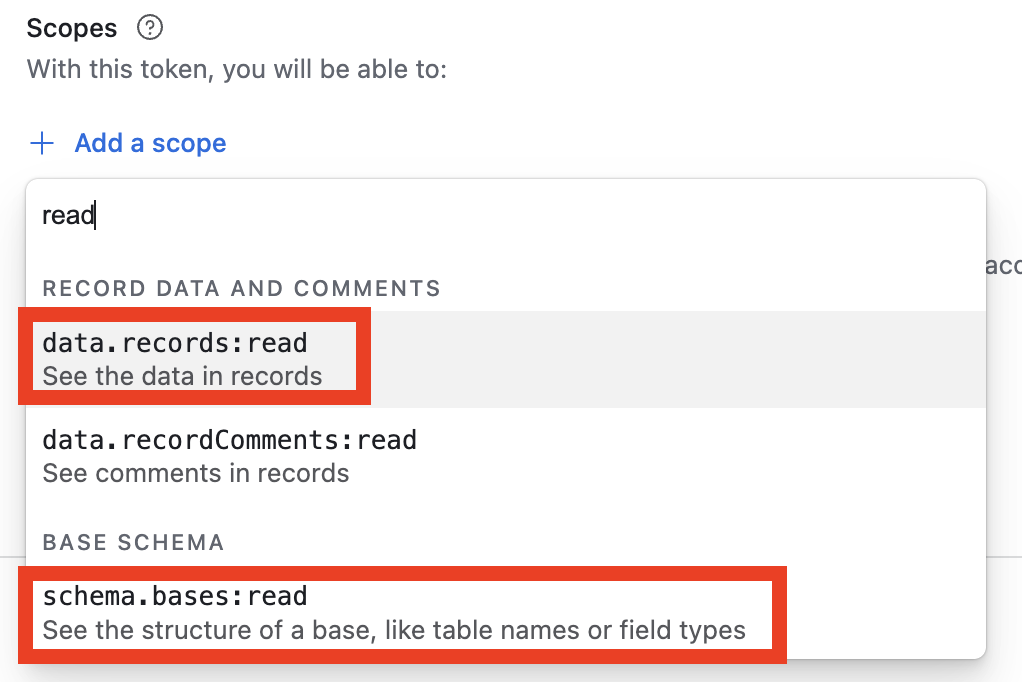
- Search for “read”
- Select both:
data.records:read- to read your table dataschema.bases:read- to read your base structure
- Grant access to specific base(s) that you want Hunch to access
- This provides more granular control over your data
- Click the left button to grant access to all your Airtable resources
- This gives Hunch access to all your bases
Security Best Practice: We recommend granting access only to specific
bases that you want to use with Hunch for better security control.
Step 3: Generate and Copy Token
- Click “Create token” to generate your personal access token

- Copy the token and save it securely for the next step
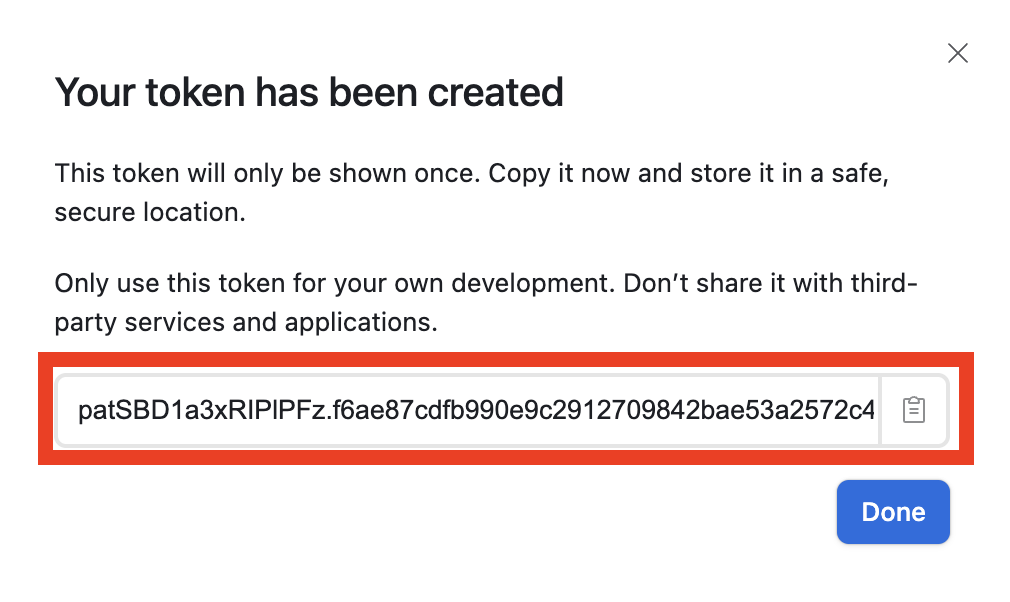
Important: Store your access token securely. You won’t be able to see it
again after this step, so make sure to copy it before proceeding.
2️⃣ Connect to Hunch Platform
Now let’s connect your Airtable account to Hunch:Step 1: Navigate to Hunch
- Go to app.hunch.dev
- Click on the Hunch logo at the top-left corner
- Select “Connect your data”

Step 2: Configure Airtable Integration
- Find the Airtable service and click “Configure” next to it

- Fill in the connection details:
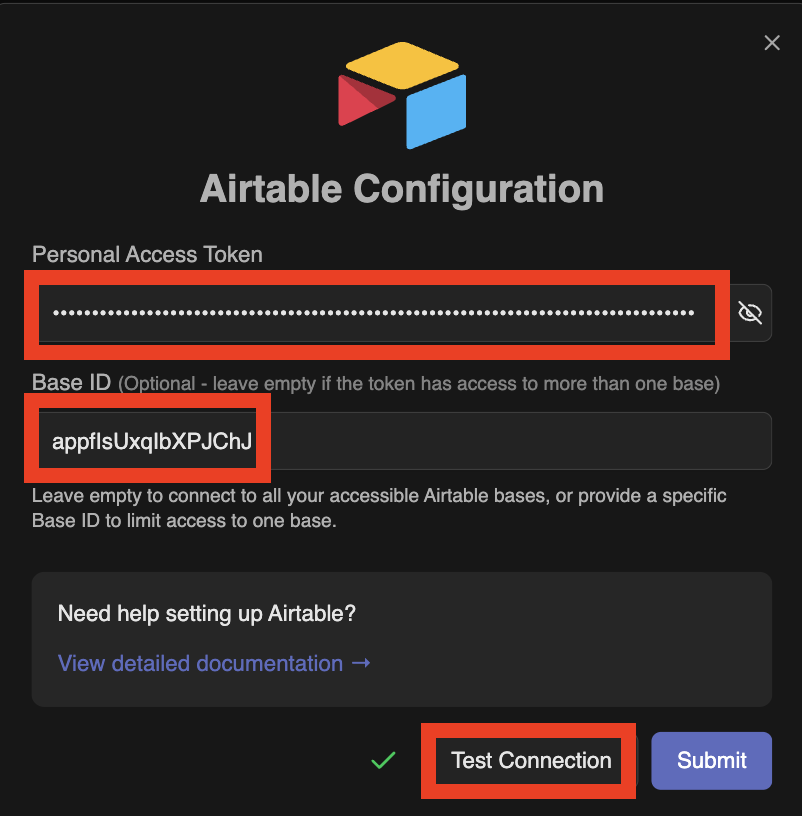
Step 3: Get Your Base ID (Optional)
If you want to specify a particular base, here’s how to find your Base ID:- Go to the Airtable app and open your desired base
- Look at the URL in your browser
- Find the sequence that starts with “app” (e.g.,
app1234567890abcdef) - That’s your Base ID!
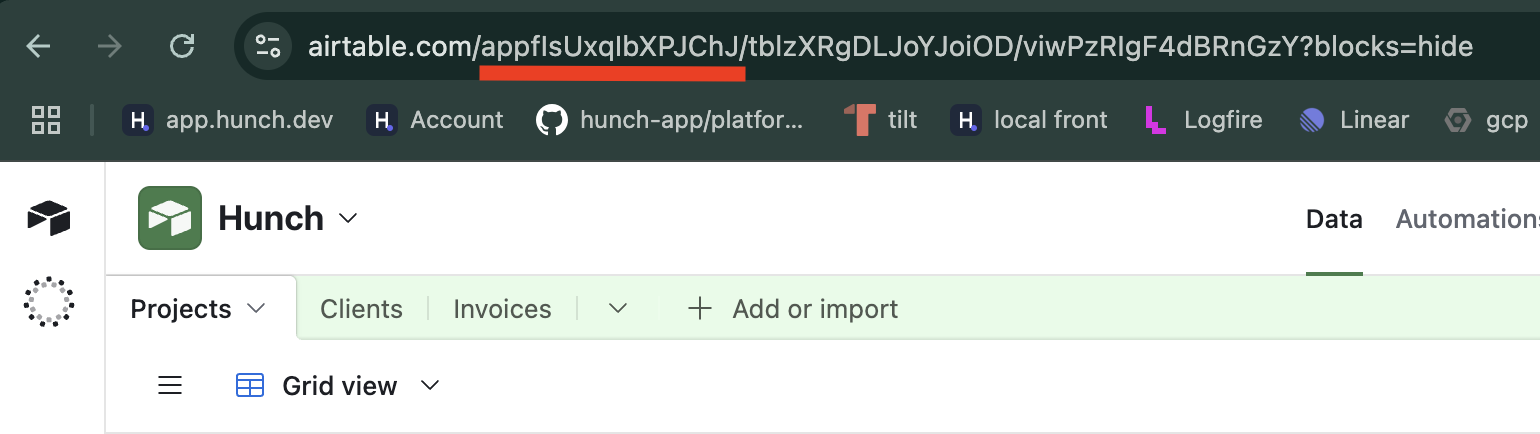
https://airtable.com/app1234567890abcdef/...
Step 4: Test and Save Connection
- Click “Test Connection” at the bottom of the form
- Wait for the connection test to complete successfully - you’ll see a green tick appear
- Once the green tick appears confirming the connection is successful, click “Submit” to save your integration
🎉 You’re All Set!
That’s it! Your Airtable bases are now connected to Hunch. You can now ask questions about your Airtable database and Hunch will be able to access your data to provide insights and answers.🚨 Troubleshooting
Common Issues
Connection Test Failed- Double-check that you copied the personal access token correctly
- Ensure there are no extra spaces or characters when pasting the token
- Verify that your token hasn’t been revoked or expired
- Make sure you selected the required scopes:
data.records:readandschema.bases:read - Check that your token has access to the base you’re trying to connect
- Verify that your Airtable account has the necessary permissions for the bases
- If you specified a Base ID, ensure it’s correct and starts with “app”
- The Base ID should be exactly as it appears in the URL (case-sensitive)
- If you’re unsure about the Base ID, try leaving it empty to access all available bases
- If your token is lost, you’ll need to create a new one from the Airtable token creation page
- Ensure your Airtable account is in good standing and has API access enabled
- Check that you’re logged into the correct Airtable account
📞 Need Help?
If you encounter any issues during setup, our support team is here to help:- Email: support@hunch.dev
- Slack Community: Join our Slack